CloudpilotEmu
Contents
What is CloudpilotEmu?⌗
CloudpilotEmu is a web based emulator for PalmOS devices. It runs as a PWA (progressive web app) on desktop and mobile devices, and there is an embedded build that allows to add virtual PalmOS devices to your website.
This article is a technical writeup on how it was created. If you are impatient and want to just try it, those are the relevant links:
- source: https://github.com/cloudpilot-emu/cloudpilot-emu
- web page: https://cloudpilot-emu.github.io
- try it: https://cloudpilot-emu.github.io/app
Why on earth?⌗
Back in, uh, 2001 (?) when I was at university I got my first PalmOS device. A friend of mine was very much into mobile tech and gadgets and was the proud owner of a Palm V. I tried it and was hooked. When the Palm IIIx of a pal of his died with a broken board I shot a Plam (sic!) IIIe on ebay with a broken display. When I got home on the weekend we dug out our screwdrivers, put the parts together, waited for lightening to strike, and I ended up with a Frankenstein Palm IIIe. It became my trusted companion and home of all my notes, recipes, calendar, stuff and eBooks.
Over the following years I went through the IIIe, a Palm V, a m515 and finally (with a brief detour to a Sharp Zaurus) to a Centro. With the Centro’s death in 2011 my Palm days were over, and I moved on to Android (first on a hacked HTC Touch with a home patched kernel) and later iOS.
However, I always remembered my PalmOS devices fondly and missed them, together with my notes and data that remained on them. I still hold the PalmOS UI in high esteem for its combination of simplicity and productivity, and I still would prefer the PalmOS calender over the iOS one any day.
I had a brief affair with PHEM on Android which brought back many fond memories, right before locking up on me during pen input in Space Trader… again… and again… and again. Frustrated, I stopped using it, and my PalmOS itch remained unscratched.
Finally, in 2020 I started eying the source of the official POSE emulator (GPL… thank you XCopilot from which it descended) and wondered whether I could build a web based emulator from POSE myself.
PalmOS versions⌗
Before starting out, there is an important break in PalmOS land that needs explaining. Palms that ran PalmOS up to PalmOS 4 were based on the Motorola Dragonball SOC, which run a M68000 CPU core, the same CPU that powered the Amiga, the Atari ST and the Macs that predated Apple’s switch to PowerPC.
This changed with the introduction PalmOS 5: those devices now ran on a variety of ARM CPUs which offered superior performance (the Dragonball ST maxed out at 66MHz, while contemporary ARM SOCs reached hundreds of MHz). In order to maintain compatibility with the existing huge ecosystem of apps Palm embedded a M68k emulator called PACE in their platform and even kept M68k as the default target for app development. Apps would run in PACE, and syscalls were translated to OS5 calls (which was a very different operating system).
Event with the additional emulation layer in the system, apps ran noticeably faster on the new ARM devices, and embedding native ARM code into new apps allowed for even higher performance.
POSE⌗
For the emulation of OS4, the PalmOS SDK came with POSE, which itself descended from XCopilot, an open source emulator that started in the late 90s. This heritage implied that as Palm continued to add new models and features to POSE the codebase had to remain open source under the GPL. The same goes with other companies that licensed PalmOS to create their own devices: the emulator code had to be made available under the GPL.
As POSE is open source and covers many of the most popular pre-OS5 devices this is what I was going to base my own emulator on.
From POSE to CloudpilotEmu⌗
It was pretty clear from the start that building CloudpilotEmu was not going to be a simple exercise of sticking POSE into Emscripten. Instead of trying to just port the while codebase, I decided to take it apart and create a new emulator from the pieces that I wanted to reuse.
Build targets: native binary and web build⌗
To keep debugging simple I wanted to run CloudpilotEmu both as a web app and as a native application. This way I could use standard debugging tools to debug my code and wouldn’t have to wrestle with debugging compiled web assembly.
The result: there is a native version of CloudpilotEmu that runs directly on the OS. It uses SDL2 for display and contains a little shell that can be used to control the emulator. This has made development much easier in many ways as I can focus on adding a feature first and only have to worry about making it accessible on the web later.
The price to pay: 64 bit support. WASM itself is a 32 bit platform, but I am developing on a Macbook, and Apple has removed 32 bit support from MacOS. But, anyway, it is not the middle ages anymore, so we’d better make sure that our code works on 64 bit platforms. To keep things interesting, the original POSE source has 32bit-isms all over the place that need to be fixed. Luckily, most of them are uncovered directly by the compiler.
Threading⌗
POSE runs emulation on a separate thread and contains synchronization code in various places. However, shared memory between threads (aka shared array buffer) was removed from all browsers as a mitigation when the Spectre and Meltdown vulnerabilities hit the road. It has been slowly making its way back since them, but usage still is subject to many restrictions, and I wanted to avoid those.
Luckily, I was going to rewrite emulator dispatch anyway, so I could just remove threading and hope that the result still performs well without overloading the main thread and blocking the UI. Even better: turns out it does.
Interaction with PalmOS⌗
POSE has a peculiar feature that is used in many places: it allows direct calls of PalmOS systraps from the host system. The mechanism is scary and clever at the same time. When POSE wants to call a PalmOS trap it creates a stack, pushes the trap parameters to the stack and finally jumps to a trampoline. The trampoline executes the desired system trap and then triggers a trap 12. Once trap 12 is triggered POSE pulls the result of the syscall from the stack, restores CPU state and continues execution as if nothing had happened.
But there is more: POSE also detects and instruments system traps to execute code both before and after the trap has been called by M68k code. Those hooks are called “headpatches” and “tailpatches” in POSE-speak.
Those mechanisms are used extensively by POSE. They are used for installing databases, setting the hotsync user name, setting date and time, hacking around inaccuracies in the hardware emulation, and for many other things. On particularly important use is input: POSE does not emulate the touchscreen hardware, but directly calls into the OS to inject pen (and keyboard events).
The number of systrap patches in POSE is huge and slightly intimidating. However, many of them are used solely for memory profiling and application fuzzing with POSE’s “Gremlins” feature. What are Gremlins, you ask? Application developers would stress test their apps by telling POSE to feed random UI interactions into their apps, trying to crash them. Pretty cool, right? However, I was going to build an emulator, not a development tool. I decided to not include any of this, and instead started without any patches at all and only included selected patches once I actually need them.
The result? I have much fewer patches than POSE in my code. The code is much simpler, and less patches also mean less room for bugs. However, those that I have (either kept or added) have turned out to be terribly useful — they allow to integrate the emulator deeply with PalmOS, and they also allow to work around those places where the hardware emulation is incorrect and correcting it is not feasible for lack of documentation (or just too tedious).
Pen input⌗
In particular I have kept POSE’s touch event dispatch mechanism. I have toyed around a bit with the possibility of emulating the touch hardware directly (which wouldn’t be exactly hard), but using event injection comes with the advantage of having 100% precise touch points without any need of calibration. I have still retained calibration during setup for the retro vibes, but it has no impact on the actual touch accuracy.
The downside? Injecting PalmOS events is dangerous. If there are no user events, PalmOS will go idle, put the CPU to sleep and wait for the next interrupt. If the interrupt is triggered by an input event the handler will wake up the system again, which then drives the event loop. However, if we do not emulate pen interrupts we have to wake up the system ourselves if input occurs. If this happens at the wrong time, the system will lock up!
This is not a theoretical issue, but it has happened to me various times on specific versions of the OS. In fact, I am pretty sure that this also what made my brief encounter with PHEM on Android so unpleasant: pen input would lock up the system randomly.
After playing around a lot with the dispatch mechanism the result now differs from POSE, but I have not encountered any stability issues anymore. Instead of trying to run the emulation to a safe point (as POSE does) I am now piggybacking on the traps that are dispatched by hardware interrupts, including the timer. Input events are queued, and only once a (timer) interrupt occurs the next event is injected and the system is woken up. Without access to the full PalmOS source (or heavy reverse engineering) there is no way to tell whether this really is 100% bulletproof, but it is working well. Of course, if anyone ever were to switch of timers and sleep… but no one would do so, right? 😛
Another issue with pen input were empty (nil) events. The original POSE code
generates a nil event to wake up the system. Those particular nil events would
not occur on real hardware, and their presence trips up apps that rely on the
event loop (more specifically on regular nil events) for timing — as an
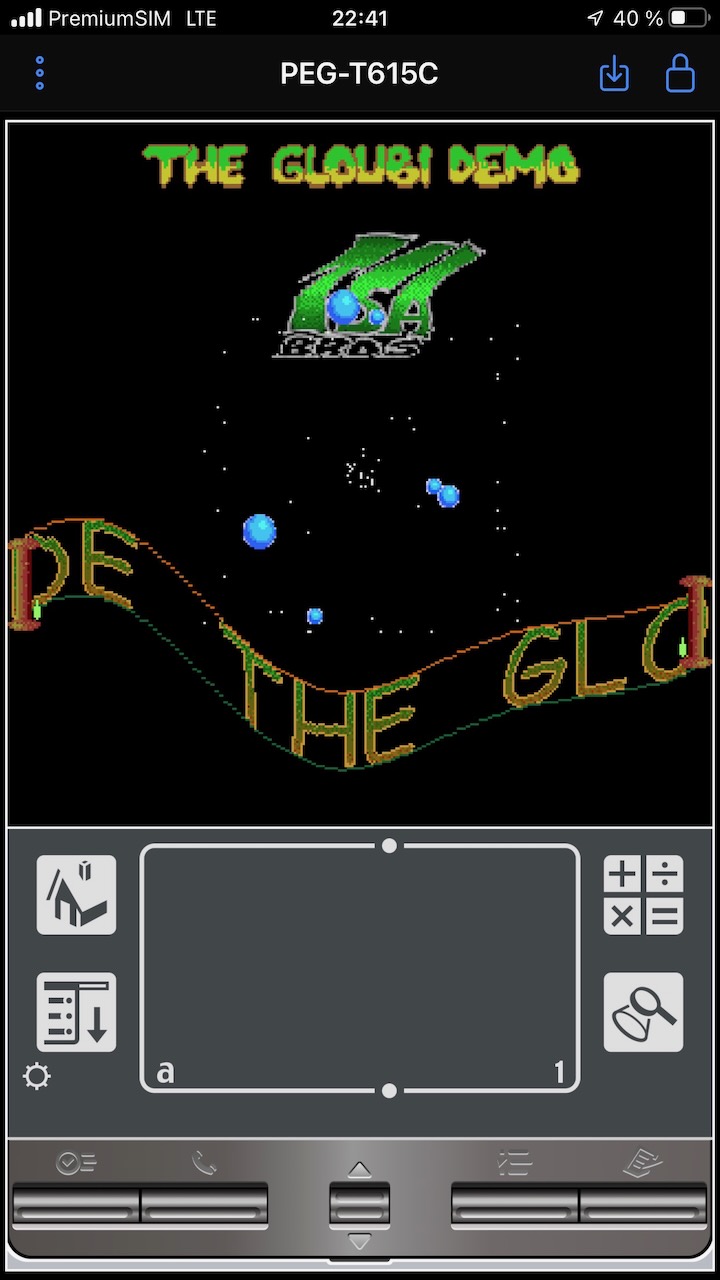
example, Lemmings would run about twice as fast while the pen is pushed down.
The solution? Don’t send nil events. OS4 has an API for that, but older versions
don’t. Bummer. However, it turns out that calling EvtWakeup sets a flag in low
memory after wake up that tells the event loop to dispatch a nil event. Reset
this after calling EvtWakeup, and the nasty nil is gone.
Timers and dispatch⌗
One of the weakest spots of POSE is timing. The emulator runs in a loop on a secondary thread and just keeps on churning through M68k instructions. After each instruction the timer increments by a fixed amount. Every time the CPU goes into sleep the thread is stopped for a fixed amount of time (10ms to be precise) and a timer interrupt is flagged immediately afterwards.
POSE makes no effort at all to execute either the correct number of cycles per second or to increment the timer at the correct rate (and fudges a timer interrupt each time the CPU goes to sleep). The result? All timings in POSE are seriously off. The cursor blinks like crazy and apps run at weird speed (usually much too fast).
This is not what I wanted for CloudpilotEmu, so I rewrote the handling of dispatch and timers. Dispatch now works by executing a fixed number of timeslices per second. CloudpilotEmu keeps track of the “virtual clock” of the emulated Pilot and, each timeslice, calculates the number of cycles required for the virtual clock to catch up with the real one. It then runs the CPU for approximately the requested number of cycles and finally updates the virtual clock with the actual number of cycles executed.
The timer is updated every clock and increments at the rate that is actually configured on the Dragonball. For reasons of performance, those updates are not actually executed each clock, but CloudpilotEmu keeps track of the last update and updates the timer when the registers are accessed or the time to the next timer interrupt has elapsed. The number of clocks per second is calculated from the registers of the Dragonball, too.
Altogether, this makes for a much better reproduction for the actual device speed. How good?
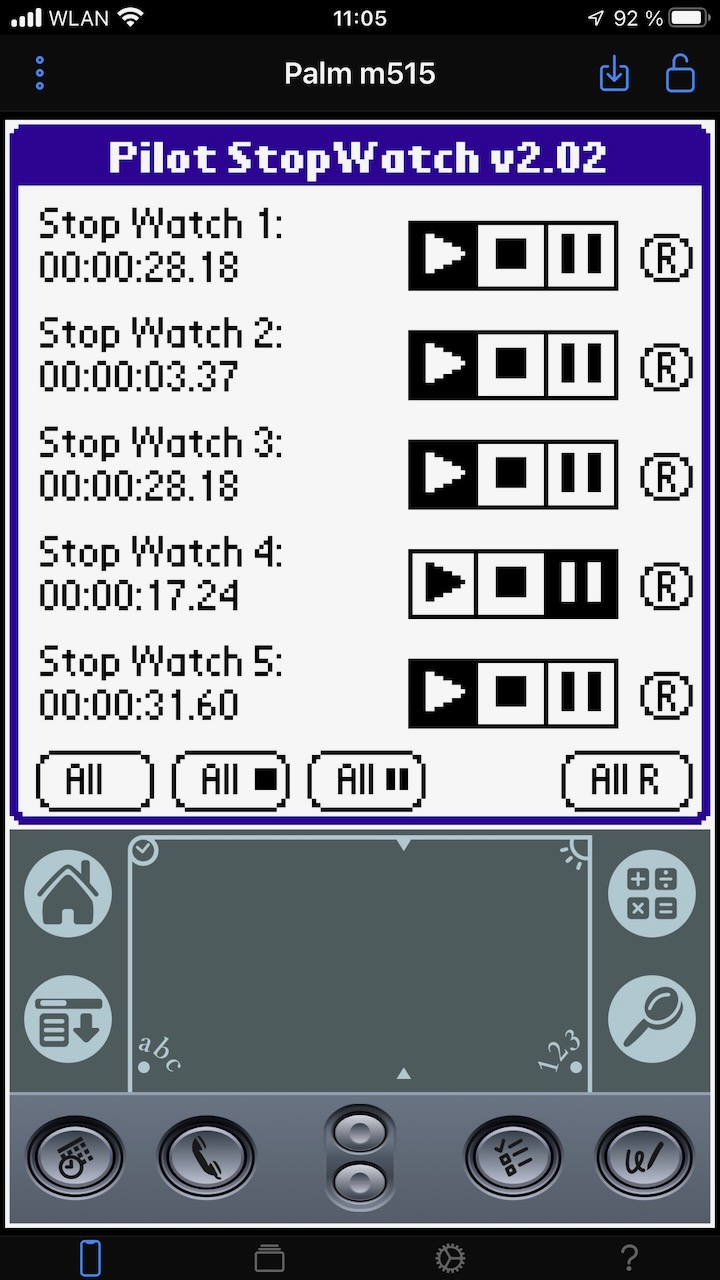
Well, there is one thing that is not properly accounted for, and that are the waitstates that are executed by the CPU on memory access. This means the emulated CPU still is slightly too fast. The timers, however, are pretty much spot on. The result feels slightly snappier than the real thing, but other than that behaves exactly like a real Pilot. In fact, you can run a stop watch on CloudpilotEmu exactly in sync with a real watch.
As an added bonus, this setup allows to change CPU speed without affecting the timers. This can be done by changing the speed setting in the UI (so you can go back to the slightly more sluggish feel of a real device), but CloudpilotEmu also does so on purpose if the host device is too slow to keep up with the virtual Pilot.
Save states and continuous saves⌗
Web pages must expect to be closed without warning anytime. The user may close the page. The tab may background and the browser may decide that the precious memory is better used elsewhere. The browser may terminate. If you don’t want your state to be lost, you better should save it regularly and automatically.
For CloudpilotEmu, this means regular save states. Every second, it saves it state to the browser’s IndexedDB. If the app restarts, it will restore from the latest save state. One second isn’t long, and for the user it seems as if they just continue where they left of.
Of course, POSE has save state code. However, it is stream based and does dynamic allocations, something that I didn’t want. In order to make those regular save states as performant as possible I wanted something that worked with a fixed amount of memory. With this reasoning I did decide not to port over the POSE save state code and instead roll my own.
This may seem like a case of premature optimization, and it probably is. However, the new code has some nice properties. For starters, a save state is split into chunks, one for each different hardware component. Chunks are versioned individually, and this makes it easy to migrate between incompatible updates to the save state content. It is even possible to add a new chunk or remove an old one between versions, something that has already proven to be useful.
Also, the new code makes heavy use of templates and is designed such that a single template method is used for both writing and reading a component’s save state. This means that it is hard to get state reads and writes out of sync, and I am pretty sure that this has saved me a lot of trouble on several occasions.
Finally, there is the matter of RAM saves. The original code persists RAM as a part of the save state. The Palm m515 has 16MB of RAM, and with one save per second this means 700 MB save state date per minute. This sounded a bit too much for me, and so I removed RAM from my save state data.
Instead I divide RAM (and VRAM if applicable) into 1kB pages keep track of which pages are modified. The save state is written in a transaction, and during the same transaction the modified pages are written to IndexedDB. Both steps happen in a single spin of the event loop, so no emulation happens between them. If save state and modified pages are written successfully, the list of modified pages is reset. If the write fails the transaction is rolled back and the modified pages list remains unchanged.
This way, usually only a few kB per second are written, while save state and RAM data are still guaranteed to be consistent with each other.
Error handling⌗
If you have ever used POSE, you may have seen it may lock up and stop responding. Chances are that this lockup was caused by one of several potentially endless loops hidden in the code. For example, if the host calls into PalmOS and and the M68k code fails to return, POSE will sit waiting for the syscall to return forever. A more subtle loop exists if the M68k code traps with the stack pointer in lala-land: the CPU will try to write an exception frame, which triggers a new bus error, and the result is a merry-go-round that locks up the emulator.
With POSE, this is mildly irritating, but not fatal: you kill and restart the emulator, and that’s it. With CloudpilotEmu running on the browser, this is fatal: if an endless loop is encountered in web assembly, the main thread will lock up, and the browser tab will freeze. Not good. And even worse: once we kill the tab and reload, the app will restore state and could merrily enter the same deadlock again.
The solution? I have tracked down all endless loops that I could find and have added assertions that throw a JavaScript exception if the loop cannot terminate (or doesn’t terminate after a fixed number of cycles). There is no way to recover from this state (as the C++ call stack is corrupted by jumping back out into JavaScript), but the JavaScript part of CloudpilotEmu can prevent the session from automatically resuming on the next load, and it can display a nice dialog telling us about the crash and offering a reload.
If the session goes on crashing once we resume the session manually we can just reset it from the session tab. This will remove all hardware state but retain the contents of RAM, so this is equivalent to a restart.
All in all, this is not the most pretty solution, but way better than freezing the app on start. Besides, endless loops have become very rare by now.
Installing and backing up databases and apps⌗
A PalmOS emulator is useless unless there is a way to install databases and apps. POSE already has code to do this, and after I ported it installing apps worked fine.
However, I also wanted the other direction, backing up databases from the
virtual device. PalmOS has a function for this called ExgDBWrite. However, this
function expects a callback that receives chunks of data and writes them
wherever they should go. In order to use this function I added a way to register
native callbacks as function pointers in the emulated code. If a callback is
registered a trampoline is mapped into M68k address space that consists of a
single a RET instruction. A breakpoint is added at this address, and once the
breakpoint is hit the callback parameters are pulled from the stack, the
callback is invoked and the result is pushed to the stack. After this, emulation
resumes and the RET returns to the caller.
With this mechanism in place, exporting the databases works simply by iterating
over the databases on the device (the list of which is obtained by calling into
PalmOS), calling ExgDBWrite for each of them and storing the serialized
databases directly into a zip archive. Done.
The only exception are PalmOS 1.x and 2.x devices which do not support the exchange manager API. On those devices there is no support for database backups. Life is tough.
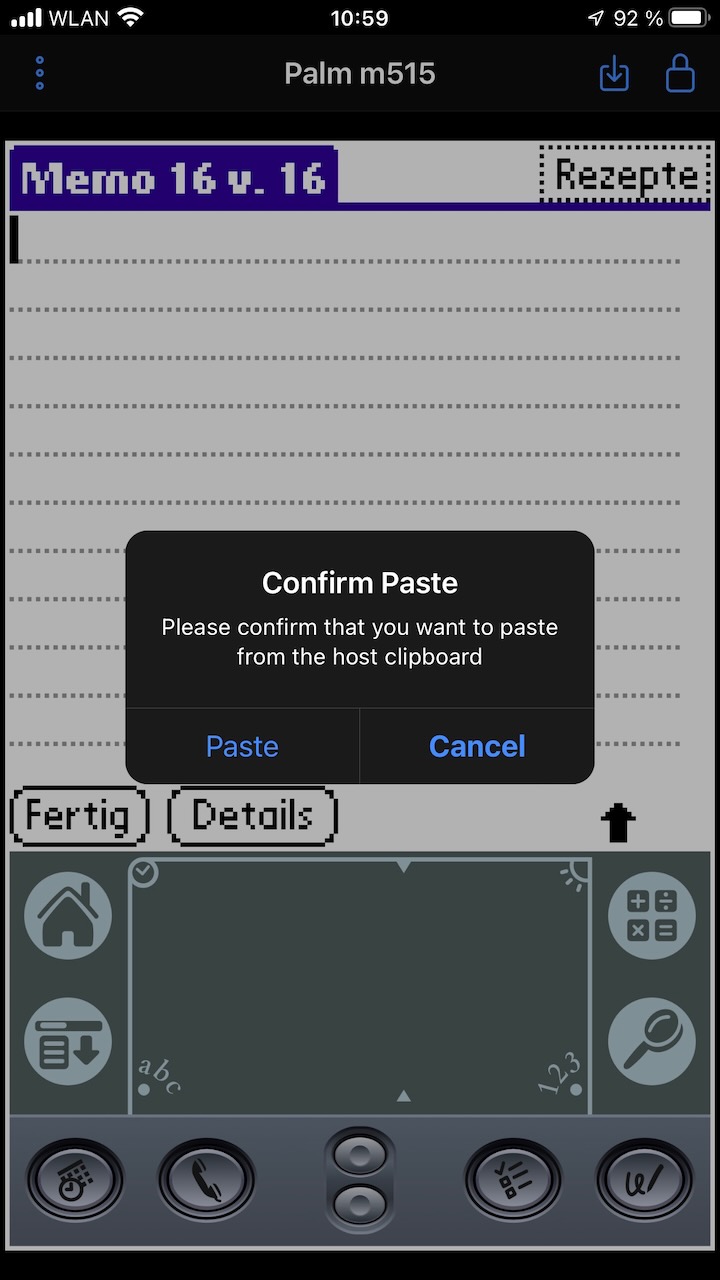
Clipboard integration⌗
Pasting between the host and CloudpilotEmu should be pretty straightforward to implement, right? Hook into the systraps for pasting and copying and call the corresponding browser API. There’s even POSE code for handling copies and pastes. However, there is a tiny problem here: the HTML5 clipboard API is async!
For example, reading from the clipboard via navigator.clipboard.readText()
will not return the contents of the clipboard, but instead a promise. The
promise enables us to register a function that will be called at some later
point when the data is available.
This does not line up with the way web assembly works. We cannot just suspend execution until the promise resolves, but all code between entering and leaving web assembly is executed synchronously.
Of course this problem is not new, and Emscripten (which is the C/C++ compiler + runtime that we are using) has a solution: asyncify. Enabling asyncify allows us to suspend execution of WASM and resume it at some later point. However, this comes at a price: to implement this, asyncify has to rewrite our WASM code and split functions into thunks at all points where an expression may have an async result.
The result is a performance hit — Emscripten quotes a factor of around two. This may be acceptable for many applications, but not for an emulator. So, no asyncify for us.
Instead, I added a mechanism to suspend the emulator. A systrap hook (like
ClipboardGetItem) can now suspend execution of the emulator. Before executing
the next instruction the dispatch loop checks whether emulation has been
suspended. If it is suspended the timeslice is finished and no further emulation
occurs. The top level code will now check the reason for the suspend and, in our
case, call the browser API to read the clipboard.
The emulator remains suspended as long as the browser API does its thing, and once the call has finished a method is called to resume the emulator from suspend. The emulator now calls PalmOS to copy the result to the PalmOS clipboard and then ends the suspend. At this point, the syscall continues to execute with the next spin of the dispatch loop, and the clipboard data is replaced with the data from the host clipboard.
The same mechanism is used for clipboard copies. What remains are UX issues as the clipboard API needs to be called from an user interaction. Of course, the user taps the emulator when they hit copy or paste, but the event handler will just call into WASM to queue up the interaction. One of the next timeslices will then execute the M68k code that eventually dispatches the systrap that we hooked, but this is already separated from the actual interaction that triggered the copy.
So, what I do is display a confirmation dialog after each copy / paste that executes the actual browser API call on the click of a button. Of course, the details differ between browsers. Chrome allow copying without user interactions, while Safari insists on displaying a widget of its own that needs to be tapped after a paste has been triggered. The result is a mess but works well enough in practice.
Sigh. A lot of work for a simple feature.
Network and network hotsync support⌗
Starting with OS2, PalmOS devices had a network stack. Connections were usually established via PPP over an attached modem or via infrared. Once the Pilot was connected to the internet the connection could be used to hotsync the device over the network, and apps could be used to browse the internet, access emails and so on. There is even an HTTP server for PalmOS that serves notes, address book items and such.
Network hotsync. Now that sounds like a nice feature, and POSE does contain code to access the host network from the virtual PalmOS device by intercepting PalmOS' network API. The API vaguely resembles the BSD socket API, and POSE maps the PalmOS traps to socket API calls. How to port this to CloudpilotEmu?
Running in a browser severely limits network access, and direct socket connections beyond HTTP are impossible. However, there are websockets. A websocket connection allows bidirectional message passing, supports binary data and stays open indefinitely. So, if we forward PalmOS’ network calls to a custom proxy server via a websocket connection and translate them into actual socket API calls from there we can pull off the same trick as POSE and connect our Pilot to the internet.
My first plan was to write the proxy server in Go as it is produces static binaries
and has straightforward cross compilation. However, there are no platform
independent BSD sockets in the Go standard library, and the platform independent
net API abstracts the socket layer away. This would have meant more translation
work that I cared to do, so I moved on.
I finally settled on Python. The Python standard library has a platform
independent socket API that is very close to C, so most PalmOS netlib calls
can be translated into equivalent Python calls pretty easily. On the downside,
packaging is not as simple as distributing static binaries, but I use
pyinstaller
to create standalone packages that don’t require Python or any dependencies
installed, so that’s not too bad either. As HTTP server I settled on
aiohttp
— it is async, has websocket support and there is a module that adds CORS
support.
We also need a protocol on top of websocket to connect CloudpilotEmu to
the server. I settled on Protobuf: it is binary, fast, typed and there are clients
for C and Python. Unfortunately it turns out that the official Protobuf
client for C is a pretty massive slab of code and requires
pthreads. No threading on WASM (and much too much code for my tastes),
so we need something different. Luckily, there is
nanopb
— a fast, thin Protobuf client aimed at microcontrollers. It generates
plain C from .proto descriptions, and if it runs on a MCU then is lightweight
enough for us, too.
As usual I first developed network integration for the native CloudpilotEmu app and moved to the web once I had it working there. Websockets in C++. Phew. I played around with a few implementations and finally settled on boost::beast. Boost is available pretty much anywhere, and the libraries are of high quality. And there is abstraction. Lots of it. I’ll lie if I say hooking up beast was a enjoyable experience, but it works well.
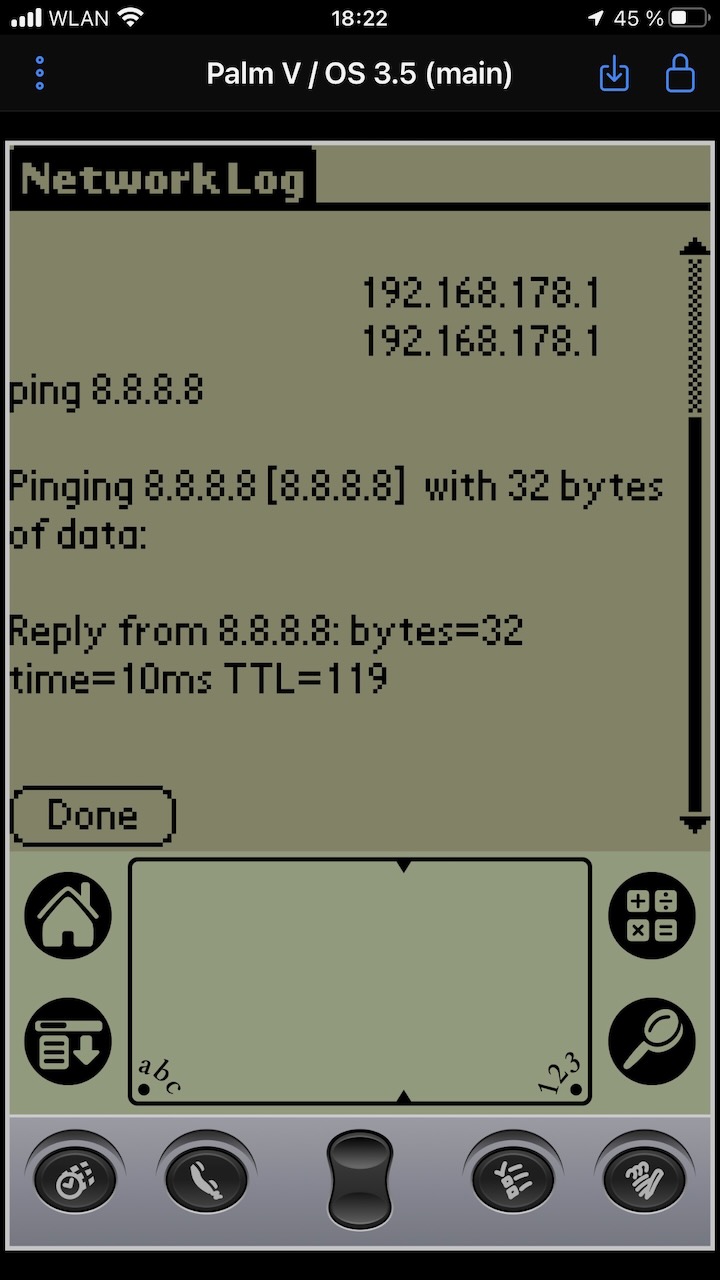
I started by intercepting and stubbing out netlib calls until I managed
a fake connection on the network console and could “ping” a mock remote by modifying
the ICMP packet and feeding it back. For the curious, the network console
has been hiding on the “network” settings tab in the menu as “Log” since
PalmOS 3. Sneaky.
Once I had ping working locally I started working on the proxy server. The round trip via the server is async, but I already covered this issue with the suspend / resume mechanism that I added for clipboard integration. After a bit of work I could do ICMP echo to actual remotes via the server, and it wasn’t long until finger worked, too.
At this point I wrote a small test
program
for testing parts of the netlib API in isolation. Shortly after that I had
network hotsync running, and finally the relevant part of the netlib API was
fully covered.
Moving to the web wasn’t hard. However, there was one challenge that I might have anticipated before: mixed content. CloudpilotEmu is hosted on github.io via HTTPS, and connections to a plain HTTP server are classified as “mixed content” and forbidden by the browser. The solution? The proxy server needs to serve via HTTPS, too. However, this requires a certificate. Most people (hopefully) won’t be running the proxy on a public server where they have a proper certificate, and so we need to use a self-signed cert.
I extended the proxy server with tooling to easily generate a self-signed certificate, but generating a certificate that is accepted by all possible clients (iOS, Android, Windows, MacOS) turned out to be a major pain in the a**. I wrote about this odyssey on the Mayflower blog. The article is in german, but there’s always google translate to help 😛
With all of this in place, CloudpilotEmu can now finally connect to the network. Hotsync works. Internet works (Xiino or Eudora Web). Of course, PalmOS cannot handle anything fancy like HTTPS or JavaScript, but browsing the web via FrogFind works surprisingly well. You can download PalmOS software directly from PalmDB. You can run an HTTP server on your virtual Pilot in the browser. And if you want a bit of palmception, you can even run CloudpilotEmu on CloudpilotEmu in a VNC session.
Audio⌗
The Dragonball contains a block for PWM audio generation that can either be used for audible square waves or for PCM playback of sampled audio. PalmOS uses this audio capability only for generating its various beeps and bops and only exposes this via API. Only very few apps use PCM playback, and those have to drive the PWM hardware directly. There is no volume control, the volume of the beeps is solely controlled by adjusting duty cycle.
POSE does not emulate audio directly, but rather hooks the system API that is used to control it. It intercepts all calls and generates the beeps using the host system. This seems easy enough to implement, but there is one catch: part of this API is sync, meaning that the API call only returns once playback is complete. Ultimately, this is the same issue that we already addressed for clipboard and network access: the emulator must be suspended until a async action (timeout in this case) has completed, and it could be solved in the same way.
However, this would imply that the emulated system comes to a full stop while audio plays, including the timers, and this messes up timing. This happens for clipboard and network, too, but those are much less common than audio playback. And, for audio there is a much better solution: just emulate the audio hardware!
The proper way to do that would be to generate a sample stream in emulation, cycle by cycle, and to play that on the host. However, this causes additional load and needs resampling to the host sampling rate. Is there a cheaper way?
Almost 100% of the audio that we are interested in consists of beeps and bops that are generated by driving the PWM block in the audible range, so we can indeed do something much more simple instead: we just track the frequency and duty cycle of the generated PWM signal, and if it is in the audible range we communicate it to the host.
On the host side we track those parameters and generate a matching square wave. Incidentally, the web audio API that we use in the browser is very good at doing this. And, as a bonus, we do not have to care about buffering and maintaining a steady stream of samples: if there is momentary jitter in timing, then we’ll get a note that is slightly too long or too short, but this is almost inaudible.
The catch is that our time resolution is limited by the number of timeslices that are executed per second (usually tied to the display refresh rate). All changes that are dispatched in one timeslice are executed more or less instantaneously, so effectively we get one audible change of the generated signal per timeslice. However, in practice, this is not much of a restriction.
Extending device support⌗
POSE supports lots of devices, and for most of them, porting to CloudpilotEmu is pretty much straightforward. However, some devices have earned a place in my heart for extra challenge 😏
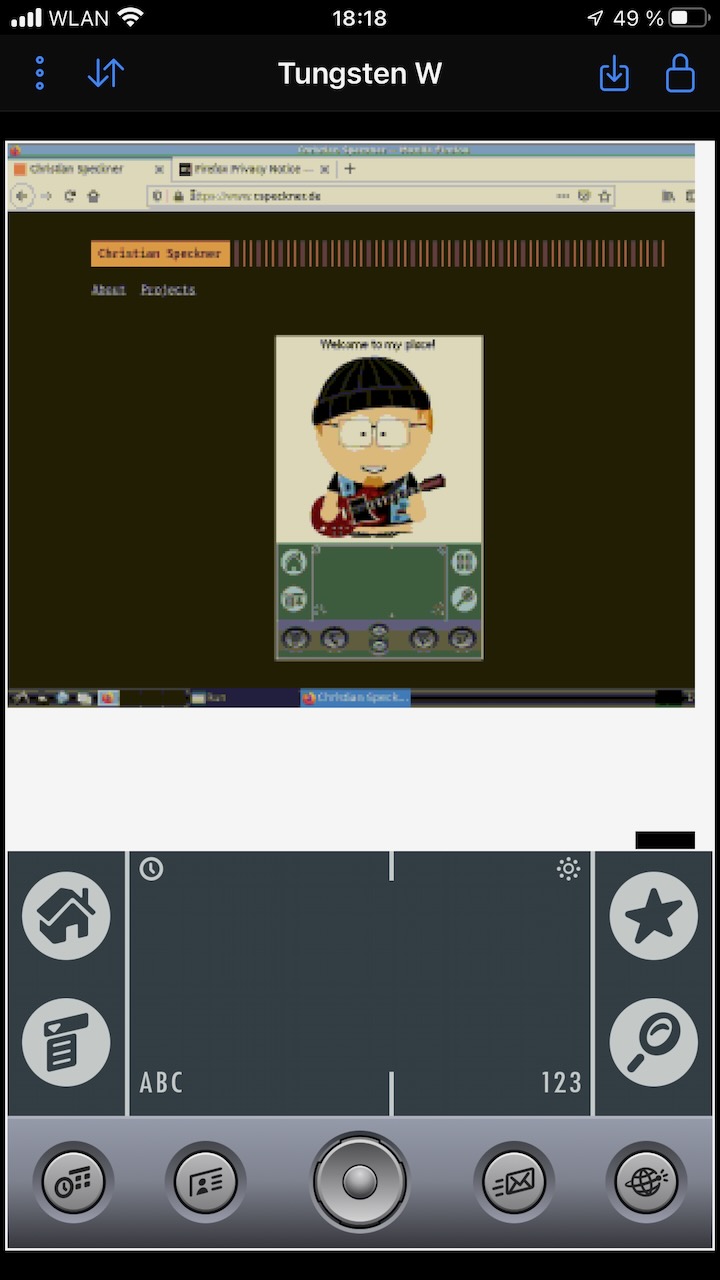
The Tungsten W⌗
The Tungsten W itself is special in many ways. For starters, it is the only HiRes (320x320) device ever manufactured by Palm that is not running OS5. It is the only Phone in the Palm OS4 lineup. It replaces the graffiti area with a small rubber keyboard. A special device, and I very much wanted to support it.
To make things more interesting, there is a version of POSE that supports the T|W, but it was only distributed as binary. To the best of my knowledge, the source code was never released.
How to start? I made a few attempts to get the ROMs distributed with POSE running by hacking on the Palm M130 hardware implementation (which also contains the glorious MediaQ MQ-1100 video accelerator used by the T|W), but to no success.
Finally, I grew weary of stabbing in the dark. I loaded up the POSE binary in Ghidra and started reverse engineering. There are no debug symbols in this binary, but I figured that the source might not have diverged too far from the POSE source that I had been working on, and so I started looking for familiar strings and functions. This soon turned up a few old friends from the source that I knew, and after getting a grasp on vtables work in MSVC I was able to identify the code I was looking for.
I ported the decompiled hardware emulation to CloudpilotEmu and was rewarded with the bootup logo of one of the two ROMs distributed with T|W POSE! However, joy was short-lived as it just kept sitting there, displaying the logo. I started logging systraps, and found that the ROM was waiting for a debugger to connect. Maybe this was a debug ROM? I tried the other ROM (which is the one I since uploaded to PalmDB) and… success!
To my utter satisfaction it did not only boot, but it even supports graffiti! It turns out that there are two slight variations of the T|W hardware implemented in POSE, one codenamed AtlantiC, and one codenamed PacifiC. PacifiC implements the hardware keyboard found on release T|W devices, while AtlantiC doesn’t. There also is a register on the MediaQ (and one on the PLD) that can be used to identify both variations. Booting the ROM on AtlantiC enables graffiti, while PacifiC has it disabled.
Could it be that AtlantiC is an unreleased prototype of the T|W that sported a graffiti silkscreen instead of the keyboard? A bit of googling later… jackpot! The prototype indeed exists.
As for CloudpilotEmu, I have chosen to expose AtlantiC (also called i710) only, and I decided to stick with graffiti. Adding those keys would be an UX nightmare, graffiti is much easier to use on a touchscreen device, and with an attached keyboard there already is keyboard input. Also, I decided against emulating the rocker and stuck with up / down only, even if the skin suggests otherwise — the buttons are hard enough to hit with a finger even without the rocker.
With hardware support reverse engineered from POSE (and a few fixes) the T|W works really well. The only things that do not work are (unsurprisingly) the phone and modem, and the power button. Enabling the phone will cause PalmOS to lock up (as the modem is not emulated). If the device is turned back on after power off PalmOS will try to reinitialize the modem and… lock up 😛 Well, we can live without that, and I just disable the power button on the T|W (and on a few other devices with similar issues).
Apart from that, the T|W is fully usable.
The Clié lineup⌗
PalmOS devices were not only manufactured by Palm, but many other companies licensed the software and produced their own PalmOS devices. Sony in particular manufactured a long series of PalmOS devices which they branded Clié. While many manufacturers stuck closely to Palm’s own designs and only added minor variations and branding, Sony’s devices were notable for the many changes and and innovations that they brought to the platform.
Among many other things, Sony introduced HiRes displays, high quality audio, a jog wheel and cameras. They also added slots for their own memory stick storage cards, and DSPs for playing music encoded with their own ATRAC codec (which is also used on minidisc). In addition, Sony also experimented with different form factors for their devices, and their lineup contains flip devices and devices that resemble netbooks. All this innovation came with numerous modifications and extensions of PalmOS.
Although all of the newer Clié devices are ARM based and run OS5, the lineup also contains a good number of OS4 devices. Even better, Sony maintained their own fork of POSE to support software development for their devices and, by virtue of the GPL, the source can still be found.
Sony POSE⌗
Looking at the source code quickly shows that Sony never cared about any platform other than windows. The sources contain windows specific code and would require porting for any other platform. However, we don’t care, as we are just interested in the hardware emulation code, and this is platform independent.
Second observation: Sony branched from an older version of POSE and never reintegrated the changes introduced in newer version. In particular, the parts of POSE that interact with PalmOS underwent significant refactoring since then, and Sony’s code needs to be modified to fit in.
Third observation: hardware support is very rudimentary. Almost all Clié hardware is only stubbed to the point where the device boots, nothing is actually implemented. Given that most of the hardware is proprietary and contains Sony IP this is disappointing, but not surprising. Moreover, the code contains numerous hacks to patch over those parts that would otherwise fail due to unimplemented hardware.
An example: Sony POSE contains code that hard codes the values of several battery related variables in low memory. In reality those are maintained by the battery manager, but as the relevant hardware is not implemented the manager reports garbage.
Fourth observation: Sony really didn’t care about compatibility with other PalmOS
devices. The code is littered with #ifdef SONY_ROM defines that would be enabled
if the code is built with Clié support, and many of those changes have the potential
to break other devices.
The upshot? Porting Clié support to CloudpilotEmu was not going to be trivial. I went device by device, starting with the simpler ones that were just minor variations of Palm hardware (like the S300). For those, support was pretty solid, and there are very few hacks in the code.
I then worked my way through the more advanced hardware until I finished with the NR70 and the T650C, support for which was patchy at best even in Sony’s own code. Of course I could not implement the missing hardware as there is no documentation for that (barring reverse engineering), but I managed to get rid of most of Sony’s hacks and found less invasive solutions for those that remained. The result still contains a lot of black magic and some twists that clearly have nothing to do with real hardware, but it works pretty reliably.
HiRes grayscale devices and upscaling⌗
Interestingly, Sony’s lineup contains a few HiRes (320x320) grayscale devices (the T400 line). As with all HiRes Cliés, Sony went their own way with HiRes support in PalmOS. The system runs a weird mixture of resolutions. For the builtin applications, text and UI are rendered at HiRes, while icons are LowRes and upscaled. This makes for a very ugly launcher (in my opinion) by default, but the launcher can be switched to display icons at half the size in order to display more apps. Neat.
By default, third party apps are displayed at 160x160 and upscaled. The settings contain a “HiRes assist” feature that can be activated to display applications at HiRes on a per-app basis. In this mode, fonts and UI are displayed at HiRes, while everything else is kept LowRes. HiRes assist is not compatible with all applications (particularly those that bypass PalmOS and draw directly into the framebuffer), but it looks pretty enough. In contrast, the scaled fallback is 100% compatible with all apps, even those that draw into the framebuffer directly — and it works without speed penalty!
How did Sony achieve this trick? Looking at the source, the T400 uses the builtin LCD controller on the Dragonball for video, just like all other monochrome Palms. This is fine, but how do they manage upscaling the whole screen? If this were done in software there would be huge performance hit, and apps that access the framebuffer directly wouldn’t work. So, there must be some hardware support.
Indeed, funky things happen when the T400 switches to scaled mode. The LCD is set to 160x320 (sic!). Panel bus width is set from 4 bit to 2 bit. The refresh rate is adjusted such that there are exactly four 160x320 images for each 320x320 image. What does this mean?
As I have no T400 to pry open and check, so I can only guess, but I think Sony has some circuit between the LCD and the Dragonball that is enabled when scaling is active. My best guess is that this circuit distributes the pixels from the first 160 lines of the four 160x320 images such that four interleaved 160x160 images form a single upscaled 320x320 image. This could work by alternating lines between even and odd while driving either the even or the odd lines of the 4 bit LCD bus with the pixels from the 2 lines that the Dragonball uses in this setup. Go through all four possible even/odd configurations for the four 160x160 images, and you get 320x320. Of course, this does not explain the weird 320 scanlines, 160 of which are garbage and need to be thrown away, so maybe this theory is rubbish after all.
Rubbish or not, this theory has little significance for emulation as we don’t emulate the LCD and just grab the framebuffer content. Instead, in CloudpilotEmu, I chose apply the same trick used by Sony POSE: I detect the asymmetric 160x320 output, keep only the upper 160 lines and scale by two.
The MediaQ MQ-1100 video accelerator⌗
Almost all of the OS4 HiRes Cliés contain a dedicated video chip that provides 2D acceleration: the MediaQ MQ-1100. This chip contains 256kb of dedicated video memory, supports up to 320x320 pixels at 16 bit color and accelerates 2D blit, fill and line draw operations.
Unfortunately, Sony implemented the MQ-1100 the same way they approached all other hardware: they stubbed it. Sony POSE does not implement any features of this chip other than the framebuffer (and hardware upscaling). Fortunately, Palm themselves were more thorough. The Palm m130 and the T|W both use the same chip, and later versions of POSE contain a pretty complete implementation. This is even more useful as most documents on this chip have all but vanished from the net (if they ever were there in the first place), the only thing that can be found is a datasheet that has detailed information on registers and signals but does not divulge much information on the actual programming model.
So I decided not to port over Sony’s half-assed MQ-1100 implementation, but instead reused the more complete emulation from Palm themselves. And… it worked!
Does Sony stubbing the chip means they didn’t use any acceleration? Nope. It turns out that there is one register that the driver checks to detect whether it is running in emulation. I implemented it, and the emulated device started using video acceleration heavily! In fact, Sony’s display driver is making much better use of the chip than Palm did for the m130 and the T|W.
For starters, Sony uses the MQ to draw fonts, which is what the m130 and T|W use it for, too (and for some line drawing if I remember correctly). However, Sony’s driver also uses the MQ to accelerate upscaling from 160x160. Yes, the MQ can do that in hardware! It is an enigma for me why Palm didn’t use that on the T|W and resorted to excruciatingly slow software scaling.
Sony also use the MQ to blit stuff from system memory, and they apply clever tricks to scale bitmaps in HiRes assist. In the launcher, they place icons in off-screen video memory and blit them from there. And there is more.
Actually, Sony are using the MQ so heavily that I had to fix some omissions and bugs in Palms MQ code. However, with out of the way MQ acceleration now works reliably on all devices that use it. Unfortunately, there aren’t many apps that make use of the MQ (as PalmOS does not expose it), but notably Warfare Inc. (an excellent RTS) uses it for acceleration, a bunch of demos rely on the chip. too.
The Dragonball SZ and the NR70⌗
Most of Sony’s OS4 lineup are based on the Dragonball VZ, the third incarnation of the SOC that is clocked at 33MHz and also powers the m515, m130 and T|W. However, there are two devices that use the fourth and final incarnation of the the SOC, the Dragonball SZ. The SZ is notable step forward from its predecessors. Among other things it includes an USB host controller, memory stick and MMC/SD controllers and 100k of embedded SRAM. Oh, and it is clocked at 66MHz. However, it seems that Sony used the SZ only for the increased clock — none of te new peripherals are used.
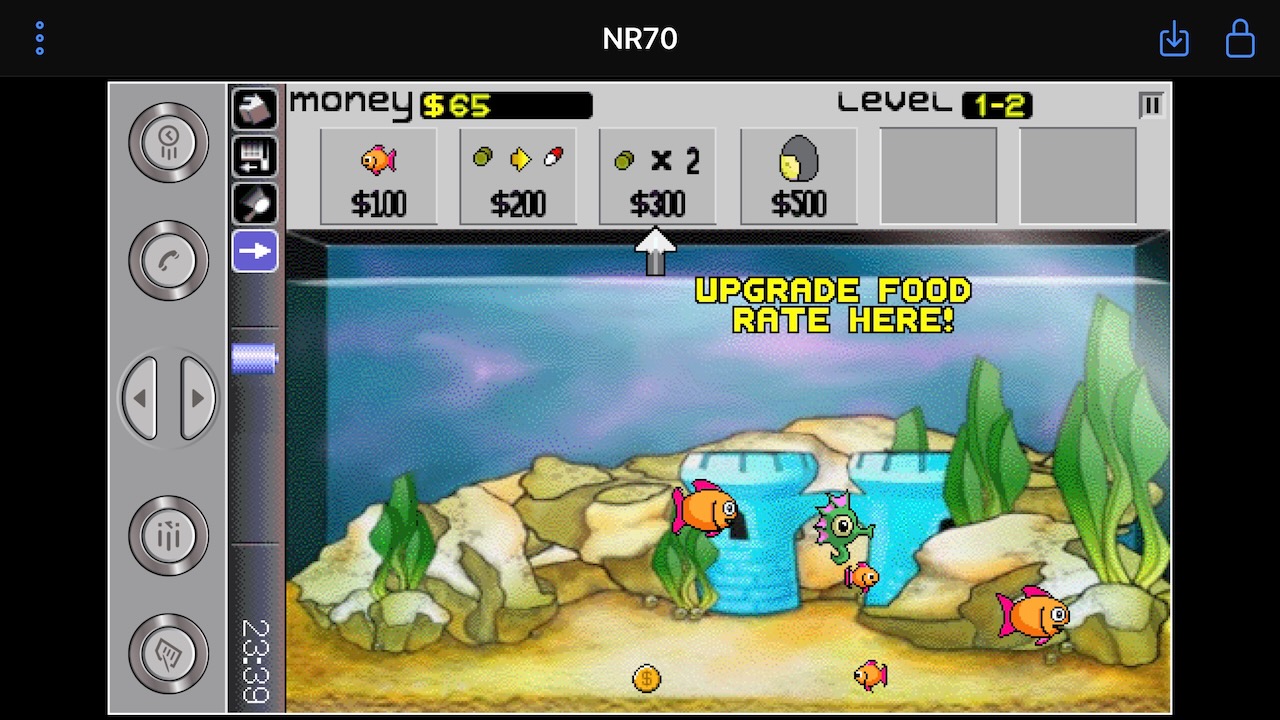
The SZ devices “supported” by Sony POSE are the T650C and the NR70. The T650C pretty much looks like an ordinary PalmOS PDA, but the NR70 is a quite different design: it is a convertible that contains a large 320x480 color screen (with a virtual graffiti area that can hide for extra space), a keyboard and a camera.
Hardware support for those two devices in Sony POSE is even more shady than for
the rest of the band. All Sony hardware is aggressively stubbed, and the
implementation of the SZ SOC is pretty much incomplete (and hides behind a
#ifdef INCLUDE_SECRET_STUFF define 😛). To make things worse, the NR70
uses the MQ-1168, the successor of the esteemed MQ-1100 video accelerator.
This makes sense as the MQ-1100 does not contain enough video memory to support
320x480 at 16 bit color, but unfortunately, there is even less information
on the MQ-1168 than on its predecessor. The only thing that can be found
on the web is a two page marketing
datasheet. I wrote to NVidia (who acquired MediaQ in 2003) but,
unsurprisingly, I got no answer.
This means that video acceleration is not supported for the NR70. On the positive side, the SZ is fast enough that the lack of acceleration is barely noticeable. Other than that, both devices work fine in CloudpilotEmu after I ported over the implementation and added the missing parts in SZ emulation.
However, there is one mess that I couldn’t sort out: GPIO and hardware buttons. The Dragonball contains a whole array of GPIOs (called “ports” in the documentation) and those are used to connect the hardware buttons and various other signals. The GPIO code in the original SZ code is a broken mess, and as long as I tried, I could not get it working properly with the Clié. I did many experiments, and I spent a lot of time going over through the disassembled button handling code again and again, but there always were some signals that produced spurious interrupts that tripped up the OS.
Finally I lost patience and just disabled all GPIO interrupts other that those that are triggered by the hardware buttons. With this hack all hardware buttons work fine, with the exception of the hotsync button on the cradle (and I stub this one by sending the corresponding keyboard event).
Another minor issue is power off: no matter what I did, I could not get the OS to power off and on again reliably. I finally resorted to disabling the power button in the UI for those devices, just like with the T|W. Oh well, never mind, not a dealbreaker in my opinion.
Unsupported Clié hardware⌗
While all Clié devices that are supported by Sony POSE now being supported by CloudpilotEmu, there are some things that currently do not work.
-
The jog wheel. This would be straightforward to implement, but it is less clear to me how good UX on touch devices for this should look like.
-
The memory stick controller. This was recently reverse engineered by Dmitry Grinberg, so support could be added.
-
The DSP. Newer Clié devices contain a proprietary and undocumented DSP chip manufactured by Sony. Little is known about this chip, but it handles memory stick I/O, audio decoding, USB (probably) and much more.
-
The NR70 camera and keyboard.
-
FM audio and samples. Most of the Cliés without the DSP contain a Yamaha chip (presumably a YMF761) that handles PCM audio and FM synthesis. Emulating the chip without proper documentation is difficult, but in theory there is enough information floating around to attempt it. In addition, interaction with the chip is solely handled by a PalmOS library (pa1lib) which could be hooked in order to redirect PCM playback to the host.
The web app⌗
First version: SDL2 on the web⌗
The first version of CloudpilotEmu that ran on the web was a prototype that did not resemble the final web app much. Instead of investing time in building a sophisticated web UI I started out by doing a straightforward build of the native SDL2 app with Emscripten and kept all code in single HTML.
In order to interact with the emulator I added a few basic functions that could
be called from JavaScript and supplemented the canvas with controls for
loading and saving ROMs and sessions, controlling the hotsync name and resetting
the device. The hard buttons were a bunch of <button/> elements below the canvas
and at the bottom there was a debug console.
The result is not pretty, but it is functional and did not distract much from developing the actual emulator. It was only after I had both the Palm V and the m515, continuous saves and session import and export working that I ditched the SDL2 in favor of a proper web app.
After the web app was complete I moved CloudpilotEmu to a github organization in order to get a dedicated github.io web page and published the new web app there. I extended the SDL2 app with a teaser that points to the web app and published a final release of the SDL2 app to my personal github page (where CloudpilotEmu was hosted before the move).
The final version of CloudpilotEmu SDL2 still exists for the adventurous, but it is not developed anymore and lacks any new features that I added to CP since the web app was released.
The web app⌗
After having the basic features in place I moved on to a web app with an actual user interface that deserves this name. Ionic is usually used for hybrid app development and as such tries to mimic the platform UI on Android and iOS as closely as possible, and so I based the CloudpilotEmu app on Ionic and Angular.
My main concern with choosing Ionic was how the app would behave on desktop browsers, but that proved unfounded. Ionic uses Material Design be default on every browser that is not iOS, and with a bit of extra styling and context menus to supplement the swipe actions the result works fine on desktop. It even honors dark mode / light mode. Neat.
The Emscripten port of SDL2 is nice enough to easily get a cross platform WASM app going, but it does not exactly blend in well with a web environment. It looks blurry on high dpi (aka retina in Apple speak) displays. It goes its own way for event and focus handling. It does not expect the canvas to go away and reappear when the UI changes pages.
All of those things could be hacked around, but I preferred to build a proper bridge between the native code and the web app and move all interaction with the host (video, audio, events, etc…) to the JavaScript side. On the C++ side I have a wrapper class that exposes all necessary functionality with an API that maps well to JavaScript. From this I generate a JavaScript wrapper with Emscripten’s WebIDL binder. This wrapper exposes methods to run the emulation for a timeslice, retrieve video frames, install databases, receive audio events, etc., and the JavaScript code builds on that.
Skins: the awesome work of Paolo Lazatin⌗
Let’s face it: I am a lousy artist. Very lousy. So lousy that I can’t get a line straight without a ruler, let alone do any kind of graphical design work. Not the best position to come up with artwork for the graffiti silkscreen and for the buttons.
Luckily, I got an offer of help from Paolo Lazatin, and that was one of the best things that happened on this project. Paolo not only came up with icons for CloudpilotEmu, but he also provided silkscreen and button designs for all supported devices. All of that as beautiful SVG vector art.
We went for a reduced design that does not comprise a full device skin, but just the silkscreen and the buttons with a stylized hint of the actual device body around the buttons. This keeps the screen clean and focused on the important stuff (the device touchscreen) while preserving the “zen” of the original device, and I am very happy with the result. Thank you, Paolo!
IndexedDB, state saves and keeping data consistency⌗
IndexedDB is the way to go to store large amounts of data offline in the browser, and that’s what CloudpilotEmu uses to store user sessions. Session data is updated automatically every second and whenever a session is switched. This means that there is no need to save a session by pressing a button — the device can be used continuously without worrying about persistence, just like a real Palm.
What does a session consist of? The ROM image, the device RAM and the hardware state.
The ROM image is easy. It is stored in the DB when the session is first created, and the session references it by its MD5 hash. If another session is created with the same ROM the stored data is reused. The ROM is removed from storage only if all sessions that reference it are deleted. A ROM usually is a few MB in size.
Hardware state is the information that CloudpilotEmu requires to restore all hardware to its previous state when the session is resumed. This includes CPU and device registers, systrap hooks, breakpoints, but not the framebuffer (on devices with separate video chips). Without hardware state the device would reboot when the session is resumed, but all data would still be there. Machine state is < 100kB in size and a complete snapshot is saved whenever CloudpilotEmu updates the session.
The device RAM consists of both the internal RAM and the framebuffer (if applicable). Its size varies between 1MB and 17MB and it changes continually. Those changes are what we are really after when we update the session. In order to keep the amount of data written to IndexDB low, CloudpilotEmu divides RAM into 1kB pages, tracks writes and only writes out those pages that changed.
While this keeps the amount of data written low, it opens a can of worms: data consistency. If a bunch of RAM changes were to get lost, the contents of RAM would silently go corrupt. Most likely, this corruption would only become apparent at some later point if data goes missing or PalmOS crashes horribly. Obviously we must avoid this at all costs.
In order to avoid this type of corruption, CloudpilotEmu updates its savestate inside a transaction. When the transaction starts the machine state and RAM changes are copied from the emulator atomically, and the list of changed pages is only reset when the transaction succeeds. If it fails nothing is written, and the next transaction will try to save all attempted pages from the last transaction plus those pages modified since then.
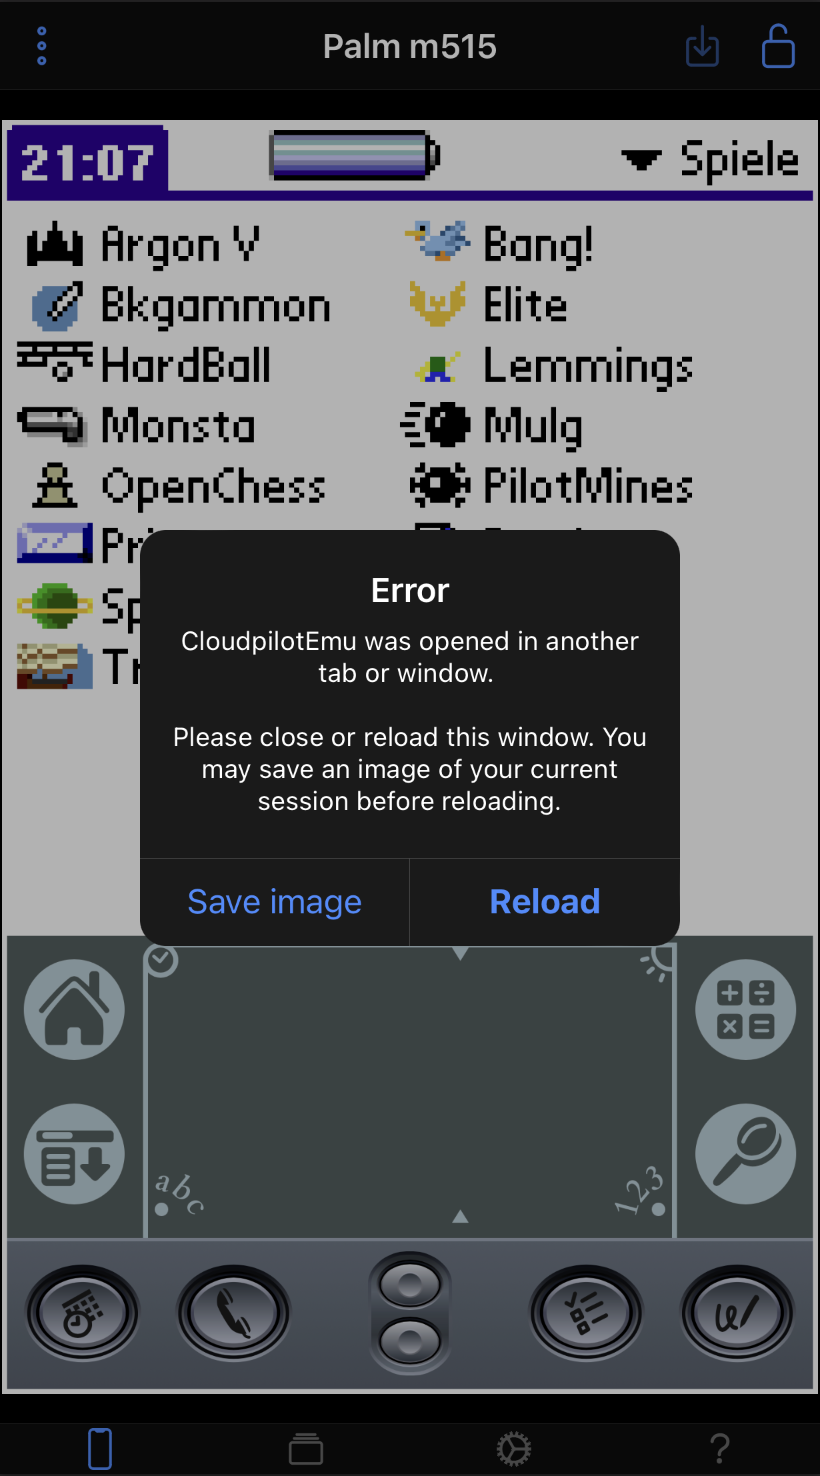
However, in a web browser there is another source of corruption: multiple tabs. If the same session is opened in another tab, both instances of CloudpilotEmu will happily alter the savestate and corrupt memory in the process. Very bad. In order to avoid this issue CloudpilotEmu exploits IndexedDB write locks: for each object store only one write transaction can be in progress.
When CloudpilotEmu starts it generates a random UUID and stores this in IndexedDB. Whenever it accesses IndexedDB it does so in a write transaction. When the transaction starts CloudpilotEmu checks its UUID against the stored ID. If the IDs match no other instance has started, and the write transaction guarantees that no other instance will start and interact with the DB until the transaction has finished. If the IDs do not match another instance was launched, and CloudpilotEmu stops immediately with a message.
Finally, there also is the possibility of the IndexedDB connection going bad. THis should never happen, but I have witnessed this occasionally at least on iOS. CloudpilotEmu will attempt at most three consecutive snapshots. If all of these fail, CloudpilotEmu crashes with a message, too. Actually, I have even witnessed iOS being unable to open the DB on launch, causing CloudpilotEmu to hang. I work around this by detecting this situation and immediately reloading the app.
Leaving the web behind: CloudpilotEmu as an offline app⌗
Although it looks and feels like a native application, CloudpilotEmu is still a web page: it runs in the browser, and it requires an internet connection to load. However, both constraints can be lifted to a certain degree.
While a web app always requires a browser as a runtime environment, both iOS and Android offer the possibility to add web apps to the homescreen. Metadata can be be provided to display a proper icon and a splash screen, and with the browser UI hidden from the user the result feels just like a native app. In addition, most major desktop browser offer similar functionality on the desktop.
The drawback? While there are standards for specifying metadata and prompting for installation, not all browsers follow these. Chrome and Firefox offer a standardized API to prompt the user for installation and for icon and splashscreen, but Safari does not properly support any of these and instead relies on custom meta tags in HTML to provide metadata.
The workaround? Do not rely on browser features to prompt the user for installation. Instead, CloudpilotEmu detects when the app is running in a browser on iOS or Android and displays its own installation instructions. This provides a less integrated experience than the native installation APIs on Chrome and Firefox, but it works consistently and reliably everywhere.
Generating assets (icons + splashscreens) for Android and iOS is a pain in the a**, as is maintaining the required meta tags for Safari/iOS. Luckily, there is pwa-asset-generator to the rescue. This nifty little tool takes HTML pages for icon and splashscreen, generates assets in all required sizes and writes the necessary manifest file and meta tags. Highly recommended to preserve your sanity.
With an app installed on the homescreen, the final frontier is the dependence on a network connection. Luckily, there is a solution that is widely supported: service workers. A service worker is a piece of JavaScript that is “installed” by the web page and that lives outside of the context of the page. Service workers can intercept and respond to all network requests made the page, and this allows the page to be available offline once the service worker has cached all assets.
Service workers are powerful technology, but with great power comes great responsibility. Once installed a service worker cannot be easily removed by the user, and a bad service worker can mess up a web page beyond the point of easy recovery (beyond deleting all web data). Luckily, Angular can generate a tried and tested worker for us, and all necessary configuration can be provided as a simple JSON. This is what I am using for CloudpilotEmu, and it has been working great.
How do updates to the app work? Each time the app loads the browser checks whether the service worker has changed (if there is sufficient connectivity). If the worker has been updated the new worker and assets are downloaded in the background. Once the download is complete an event is dispatched to notify the app of the update. The app reacts by prompting the user to reload to “install” the update. On the next reload the app detects the version change and confirms the update in a dialog.
So much for the theory. Of course, in real life we have to deal with bugs. Safari in particular has a habit of flip-flopping between the old and new versions before finally settling on the new version. This does not happen frequently, but if it does it may be an issue: if the save state format changes the old version may not be able to properly continue the session again. I work around this by detecting this “transient downgrade” on startup and displaying an explanation of the issue. After the next reload the problem usually resolves itself.
CloudpilotEmu embedded⌗
Ever since I first published CloudpilotEmu there has been one persistent feature request: CloudpilotEmu embedded in third party websites. The trouble with this request: CloudpilotEmu is a full-fledged Angular application that was not designed for embedding, and adding it to another website would feel awkward and cause a ton of problems.
My first approach to integrating with other websites was linking support. Links to CloudpilotEmu can be placed in third party websites (i.e. PalmDB). Clicking on such a link will open the app in a new tab and trigger the installation of either an app or the import of a new ROM or session.
However, this is not the same as running a virtual Pilot embedded in a web page. In order to properly embed CloudpilotEmu into another web page the web app will not do. Instead, we need to build a CloudpilotEmu JavaScript library that can be controlled by an API and that uses a provided canvas element for display.
Doing so is not particularly hard, but it requires to split the Angular app
into those parts that are specific to the app and those that are generic and
can be reused for CloudpilotEmu embedded. In addition, there is the usual churn
of setting up another build process and the bazillion related decisions that the
immature awesome JavaScript ecosystem enforces on you: What bundler? Which version?
What module format? How to split the code? One package? Yarn Workspaces? Lerna? How to deal with
TypeScript typings? Is the moon really made out of cheese?
I chose to stick with webpack for building the library as this is what is also used by the Angular app. The library has almost no dependencies, so I decided against the complexity of splitting the package and instead set up two build processes in a single package. Documentation is autogenerated from the source by typedoc. The library itself is UMD, so it can be used equally well with a plain web site and with a bundler.
Typings are tricky. The TypeScript compiler can emit type declaration files for all individual modules, but this is not we need. Instead, we need a single declaration file that describes the final UMD module generated by the build. Luckily there is dts-bundle-generator which generates precisely that.
Well, after shaving a million yaks CloudpilotEmu embedded is finally done. An emulator can be created by providing either a ROM or a session exported from CloudpilotEmu, apps can be installed and launched, and the emulator renders to a provided canvas anywhere on the website. The only missing features are clipboard and network integration and savestates.
The future⌗
CloudpilotEmu has come a long way since I first started hacking at POSE. In fact, it has turned out much better than I had anticipated. Still, as with any good project there are a few things that I would like to add in the future.
Support for external storage⌗
Having support for storage cards would be a nice addition, and it is more or less a requirement for adding OS5 support (see below). Of course, we are still a web app, so we can’t just mount a directory on the filesystem. Instead, additional UI is required for managing virtual storage cards. And, if we want to support FAT images in the browser, we also have to add a way to check them for filesystem errors. All in all, not a boring task.
OS5 support⌗
Adding OS5 support to POSE is out of scope for me. Palm themselves never finished it, and there are loose ends everywhere. Heck, not even the actual ARM emulation code (ported from gdb) ever made it into the public. So, adding OS5 to the POSE code would essentially mean implementing it from scratch. This is not gonna happen. Period.
However, there is another way. uARM by the incredibly talented Dmitry Grinberg is a full fledged emulator for various OS5 devices. So, we can just port it to web assembly and get OS5 emulation. Right?
Well, things aren’t that simple. POSE integrates deeply with PalmOS, and we have convenient ways to install software, backup files, etc. In order to integrate uARM seamlessly and at the same level of usability similar features will have to be added. Then we have savestates — those will have to be added to uARM, too.
And, finally, there is performance. Emulating a ~300MHz ARM SOC is in a whole different league than emulating a 33MHz Dragonball. Luckily, most Palm software does not require that much power, so by properly implementing CPU sleep (as we do for the Dragonball) we still might be able to squeeze enough performance out of the browser. Time will tell…
Sampled audio on Clié devices⌗
Most Clié devices support sampled audio, and quite a lot of games support it. Emulating this at the hardware level is tricky as the corresponding Yamaha sound chip is barely documented. However, there may be another way: sample playback is handled by a single library. Hooking this library (and dealing with any sync / async issues on the way) might provide a straightforward way to redirect audio samples to the host and play them from there.